Tuesday, September 10, 2019

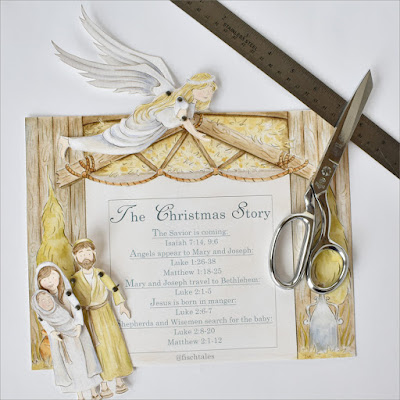
These Matchbox Scripture Crafts are a great project to boost scripture learning... use them at home, children's church, or with a Sunday school group. They are super easy to assemble, all you need is a color printer (or get them printed at your local printer), a ruler, pair of scissors, and glue (I used a glue gun... but children will need help with this step)


I suggest printing it out on card stock, so it will more durable
Cut all the pieces out and get them ready to assemble
Use a ruler to fold along all the fold lines, and then I bend the pieces back to make the box.
Cut only where there are little dotted lines, this will make your small flaps for gluing.
Fold the flaps in and glue them to the inside walls, make sure you line everything up straight so the box will fit together well when completed.
Then move to the outside cover box, fold along all the fold lines and then fold them back to make the box.
Once you have the edges bent to make the box you are ready to glue...
Place your glue down the edge with no printed design, and tuck it inside the other flap to make the cover box.

Now you are ready to add your small detail pieces to the inside. Fold in the tabs and glue your girl towards the bottom of the inside of the box, and the words towards the top. This should come together to make your scene.

Slide the cover over the box, and enjoy a fun way to learn scripture!

There are several other versions, with other scripture, in the shop. Go and check all of them out! 


Wednesday, March 6, 2019

 Bible Journaling for the Fine Artist comes out March 26th and I am super excited for it to land in your hands! BUT!! Don't miss out on the extras you can get if you pre order! If you email your proof of purchase to me at :  biblejournalingpreorders@gmail.com  I will email you a packet with printables that go along with the book and a free tutorial. But after March 26th that is not available anymore. There is a link to order out to the side, so jump through the link and check out the new book coming out soon!

Wednesday, December 5, 2018

I am so excited to share this fun Puppet theater that you can use with your kids to teach the story of Jesus! Instead of building a ginger bread house this year, build the stable with your little ones! Let your kids, Sunday school, or children's church use this to visually see the story come to life as you tell it. Let them help act out each scene and be a part of the story! 
Find it in my Etsy shop, there is a link to the store in the column on the right side of the page


This download comes with 5 color printable sheets and  instructions are available below or just email me for a copy. www.fischtale@gmail.com 
What comes in the PDF Set:
*Baby Jesus with manger and straw bundle with cut out stand
*Mary and Joseph
*Angel
*Donkey, lamb and cow
*Star and bird
*3 Wisemen with 3 gifts
*Boy shepherd with instrument and staff
*Front and back for stable with a verse card (print the back page twice to make the side panels. You can cut it down the center, making two halves, one for each side of the stable. Use a ruler to fold in the sides, using the lines of the boards as a guide to line your ruler... use the ruler to help fold a straight line.


The other things that you will need: 
*scissors
*ruler
*mini brads
*glue or double stick tape
*thin wooden dowels
*thumbtack
*large cereal box


You must be able to print all these printables out on your own, nothing will be shipped to you. I highly suggest printing all pieces out on heavy card stock with a color printer. You can also have it printed at a local printer like kinkos. 

The theater and characters come with a scripture card that give you a great place to jump into the story of the birth of Jesus, but a great alternative would be the "Jesus Storybook" by Sally Lloyd-Jones. I can not recommend this children's storybook bible enough!

I hope you enjoy making this Puppet theater, to celebrate the Christmas season, with your kids! Tag me on Instagram so I can see how you are using it!

Use a thumbtack to punch holes in your characters for arms and legs. 

Cut around each character, I suggest working on one character at a time, so there is no confusion.
I also didnt cut around each foot but instead left them together.

Use your mini brads to assemble your characters arms or legs.

Cut around the verse card and save for later, and then cut around the inside of the stable door.
I used a large cereal box for extra support, gluing it onto the back of my front and back panel. I did not use it for my side panels.

Reprint your back panel and use it for your side panels by cutting straight down the center to make two panels of the same size.

Following the line closest to the edge (the painted board) line your ruler along the line and fold a flap that you can use for gluing. Repeat this 3 more times for a total of 4 flaps, 2 on each side panel. 

Glue your side panel onto the back edge of your back panel. Repeat this for your front panel too. 

You should have a free standing box when complete.

Line the edge of your manger with a thin line of glue, you want to be able to slip the baby Jesus down between the two pieces of paper after it dries.

Your kids will be able to pull the baby in and out when it is assembled.


Saturday, November 17, 2018

 
I have been waiting to get to share this BIG announcement with you for sometime!! I have crunched in all my tips and tricks into this new book by www.quartoknows.com and it is up for pre-order now!
INSERT HAPPY DANCE!! This new book comes with pages on how to use wet medium on your bible pages, color pencil ideas, how to fix mistakes... the list goes on. AND, it has 5 step-by-step tutorials where I walk you through creating 5 pages in your own bible. I share this book with Kate Peiffer, www.beautifulbible.me  who also shares all her inside secrets! If you purchase the book during the pre-sale time, keep your proof of purchase for an extra little surprise down the road! Find a direct link on the side of the page that will take you to where you can buy the book now! It will be released in March

Wednesday, August 22, 2018

I love ferns! I would love to have them all over my backyard.... if I had a green thumb! But, since I don't, I can still paint them. Here is a step by step tutorial on how to watercolor the fern after you have drawn it, and you can also check out my drawing tutorial, on how to draw them on my Instagram page.

Step#1)
Outline your fern, lightly, with a color pencil. I choose "Kelp Green" which is a Prismacolor pencil.
Step#2)
Cover all leaves and stem with a light wash of light green. I used "Moss" green by Turner Watercolor.
Step#3)
Go back in with your darker green and shade in a few leaves, sporadically, keeping some leaves the lighter green.Add a touch of the darker green to the stem, down the center, and the stems down the branches of the plant. I used "Olive Green" by Winsor and Newton for my darker green.
Step#4)
This is your time to go back and reoutline if you want to make some of your lines darker. Don't go over ever line but just touch it up in spots, this adds variety to the line making it look a little more natural. I used my Dark Sepia Pencil, by Faber Castell, to darken my lines and shade where the branch meets the stem and I reoutlined the stem with the Sepia too.

This piece was a little more pencil than watercolor but you can see how mixing the two mediums can be a great combination. Know you can repeat these ferns in your bible, on a journal page, sketchbook, or in a painting. Hope you enjoyed the tutorial!
Melissa

Friday, October 27, 2017

I have had this print in my mind for awhile now... ever since I got the chance to fly over the ocean this past summer. I can remember flying over the ocean, which I was so nervous about, and just taking in the beauty of it all. And the thought hit me, as flew to a new country, how we are all so connected. That from the beginning of time people have been searching for something greater than themselves. There is something that is planted deep down inside our being that tells us that there is something greater than us. It dosen't matter what continent you land on, they are all searching for the answer to that question. We are all weaved together in that deep desire and scripture tells us that there is a reason for that. Thet he created each nation to search and find him, and that he is never far from us. How beautiful is that! We are one in the care of a great God... and so this print reminds me of that promise. It is available in the shop now, I hope you love it too. 

Wednesday, August 2, 2017

Shop Reopened!

After a busy but exciting summer, the shop is back up and running. My kiddos are getting ready to head back to school and I am trying to get back into the swing of work again. To celebrate I have two new prints up in the shop! I am super excited about both of them! ALSO!! Don't forget to check out the Bible Journaling class with Amanda Arneill, it is up and live and there is a link in the side bar. It is a super informative class for anyone who wants to learn or learn more about creating art in your bible.